One of our biggest organization and design challenges in our house has been the bathrooms. They're all tiny! Our master bathroom is embarrassingly small and the vanity is just about as small as they come, so there aren't a whole lot of options for storage!
I've always loved open shelving in bathrooms, but I wasn't convinced that it was the most practical idea. After looking at a bunch of different options, shelves seemed like our best option, so we decided to go for it and see how we liked it.
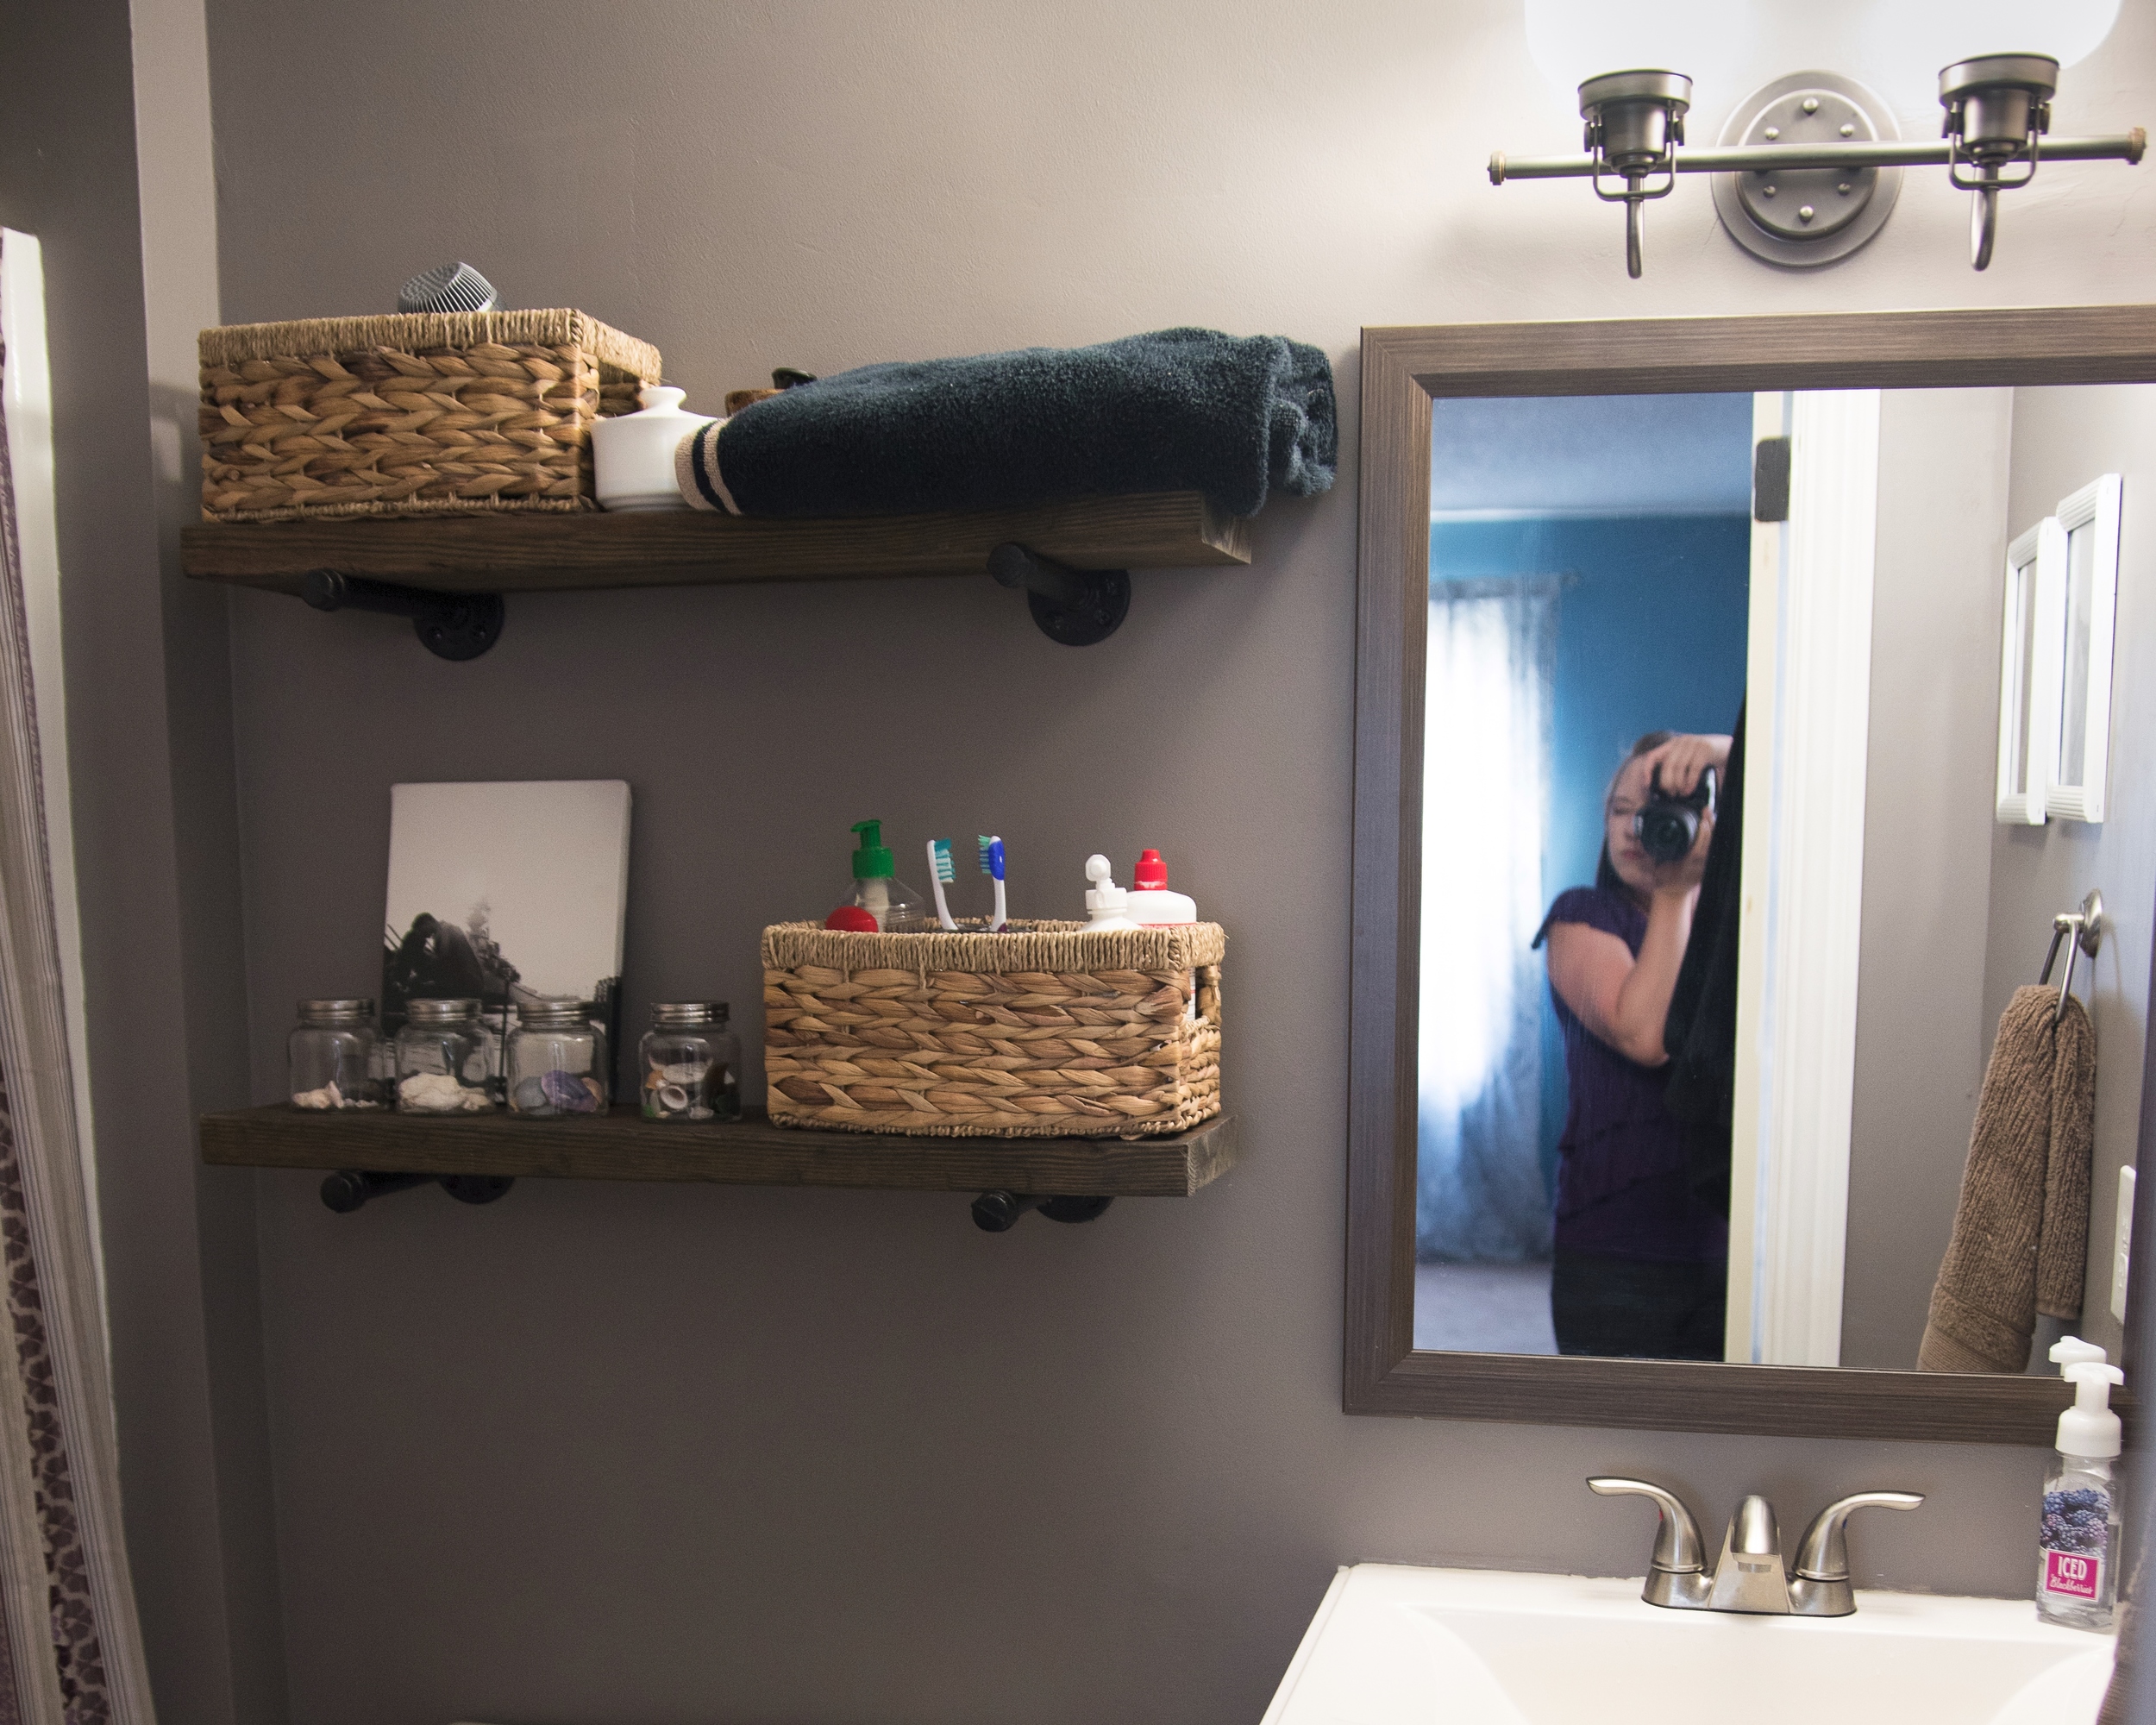
We loved the look of these Restoration Hardware inspired shelves, and followed their DIY instructions. Here are the original Restoration Hardware shelves. I actually like ours better!
We chose a darker wood stain and beat up our shelves a bit first so they would look more weathered. Ryan has tried various techniques on different pieces of furniture we've made over the past few years. His favorite options are smacking it with both sides of a hammer and a sock filled with nails. We'd recommend only doing this to the top and sides that you'll be able to see and leave the bottom alone so it will sit level on the pipes.

We didn't want the shelves to feel too crowded, so the seashell jars and canvas keep it looking pretty and still clean and open. The little jars in the middle are Ryan's shaving stuff, which doesn't fit well in the baskets. The top basket just holds my hair dryer, and the bottom basket has toothbrushes, toothpaste, contact solution, makeup remover, lotion, and deodorant. Initially we kept one of our towels folded up on the top shelf, but let's be real, they're pretty much always hanging up to dry, so that gives a little bit more space for Ryan's shaving stuff.
All our other toiletry items are either in the bottom cabinet of the sink or stored on a shelf in our closet. It's not much, mainly just our medicine, which we wouldn't store in a bottom cabinet like that for child safety purposes. Not that our friends' kids usually use that bathroom, but you can never be too careful with that sort of thing.
So that's our quick and easy DIY shelving project. And the plumbing fixtures are pretty cheap, so it definitely looks more expensive than it actually was!
Want to see more of #ourlittleyellowhouseinva posts?
We Bought a House!
Stuff that Needs Updating
Our Housewarming Party
Downstairs Before and After
One Year In: What We've Done
One Year In: Photos
You Know You Bought a Fixer Upper
Our Curtain Dilemma
DIY Pendant Lighting
Two Years & 10 Fun Facts
Master Bathroom Reveal
Master Bathroom Shelving DIY